Terminal Session
GPU-accelerated terminal with PTY support. Run shell commands, scripts, and dev tools.
Features
- GPU-rendered terminal with crisp text
- Multiple terminal tabs per session
- Command history and session replay
- Powerline/Nerd Font support
- Persistent sessions across tab switches and app restarts
- Project-aware working directory tracking
- SSH access with password or key authentication
Run commands right where you work
Switching between your project and a terminal window breaks your flow. You lose context, forget which directory you were in, and end up with a dozen terminal tabs you cannot tell apart.
The Terminal applet puts a full shell session inside your project. It starts in the right directory, stays open across tab switches, and lives next to the files and tools it supports.
- Full shell, no compromises. GPU-accelerated rendering, PTY support, and Powerline/Nerd Font compatibility. It is a real terminal.
- Persistent sessions. Your terminal survives tab switches and app restarts. Come back to exactly where you left off.
- Project-aware. Opens in your project directory automatically. No more
cd-ing around. - Multiple tabs. Run different tasks in separate terminal tabs within the same session.
- SSH built in. Connect to remote servers with password or key authentication directly from the terminal.
Adding a Terminal Session
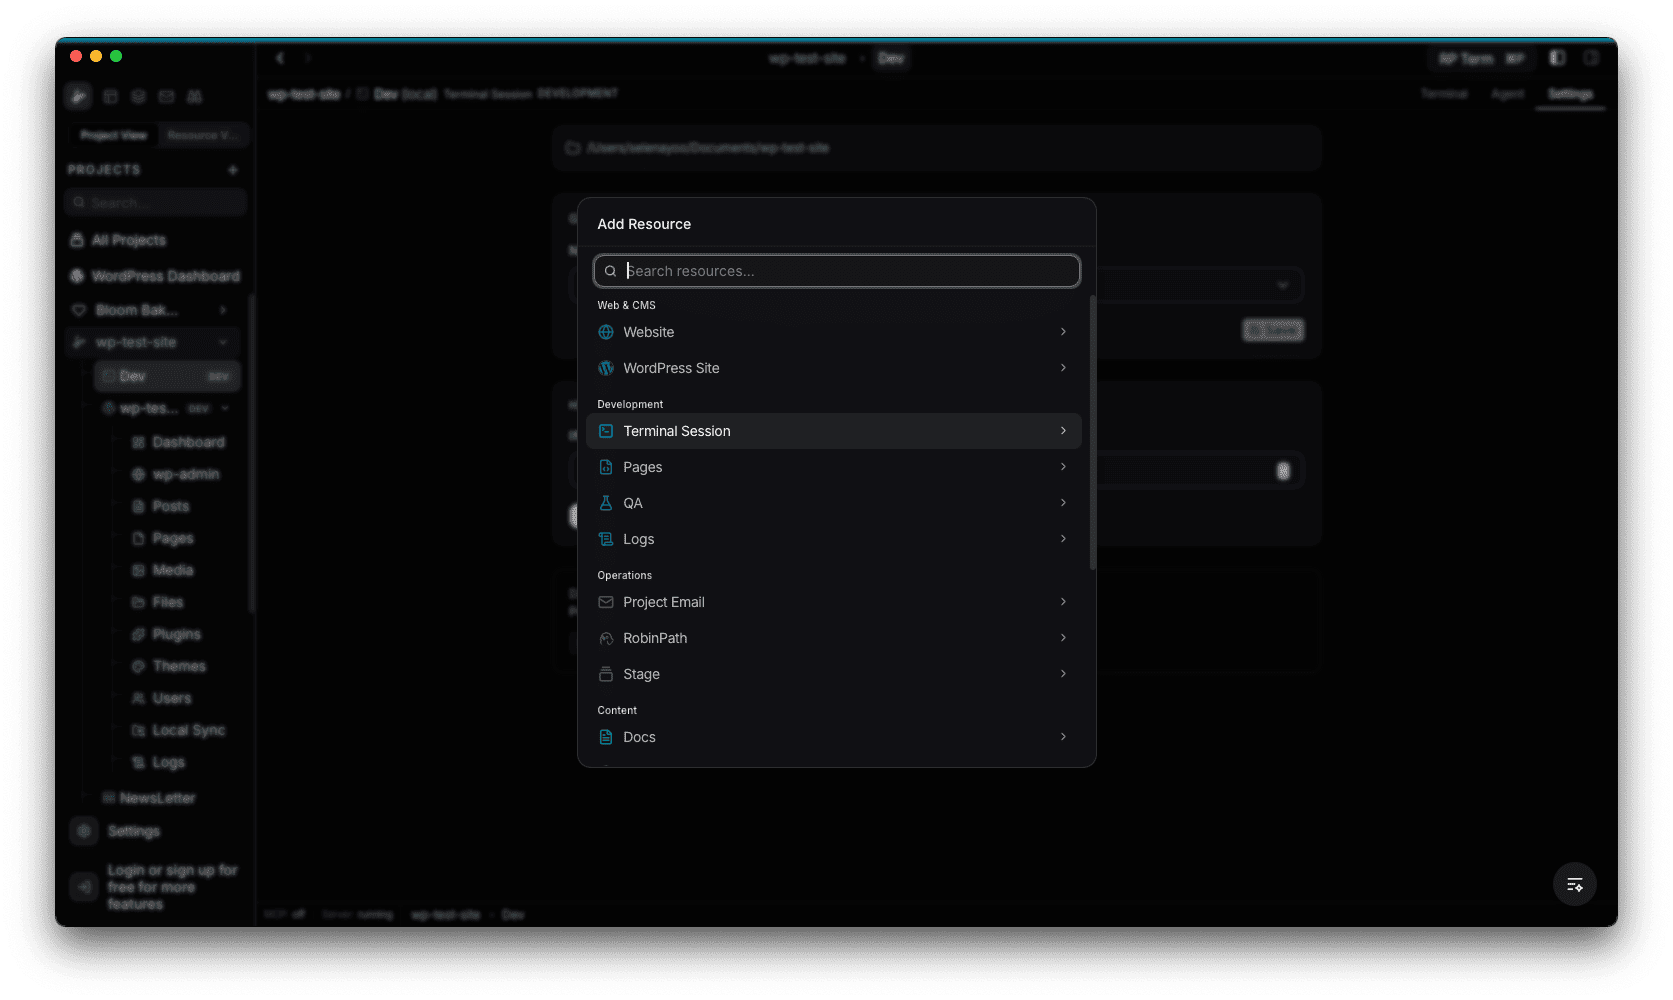
To add a terminal to a stage, open the Add Resource dialog and select Terminal Session under the Development category.
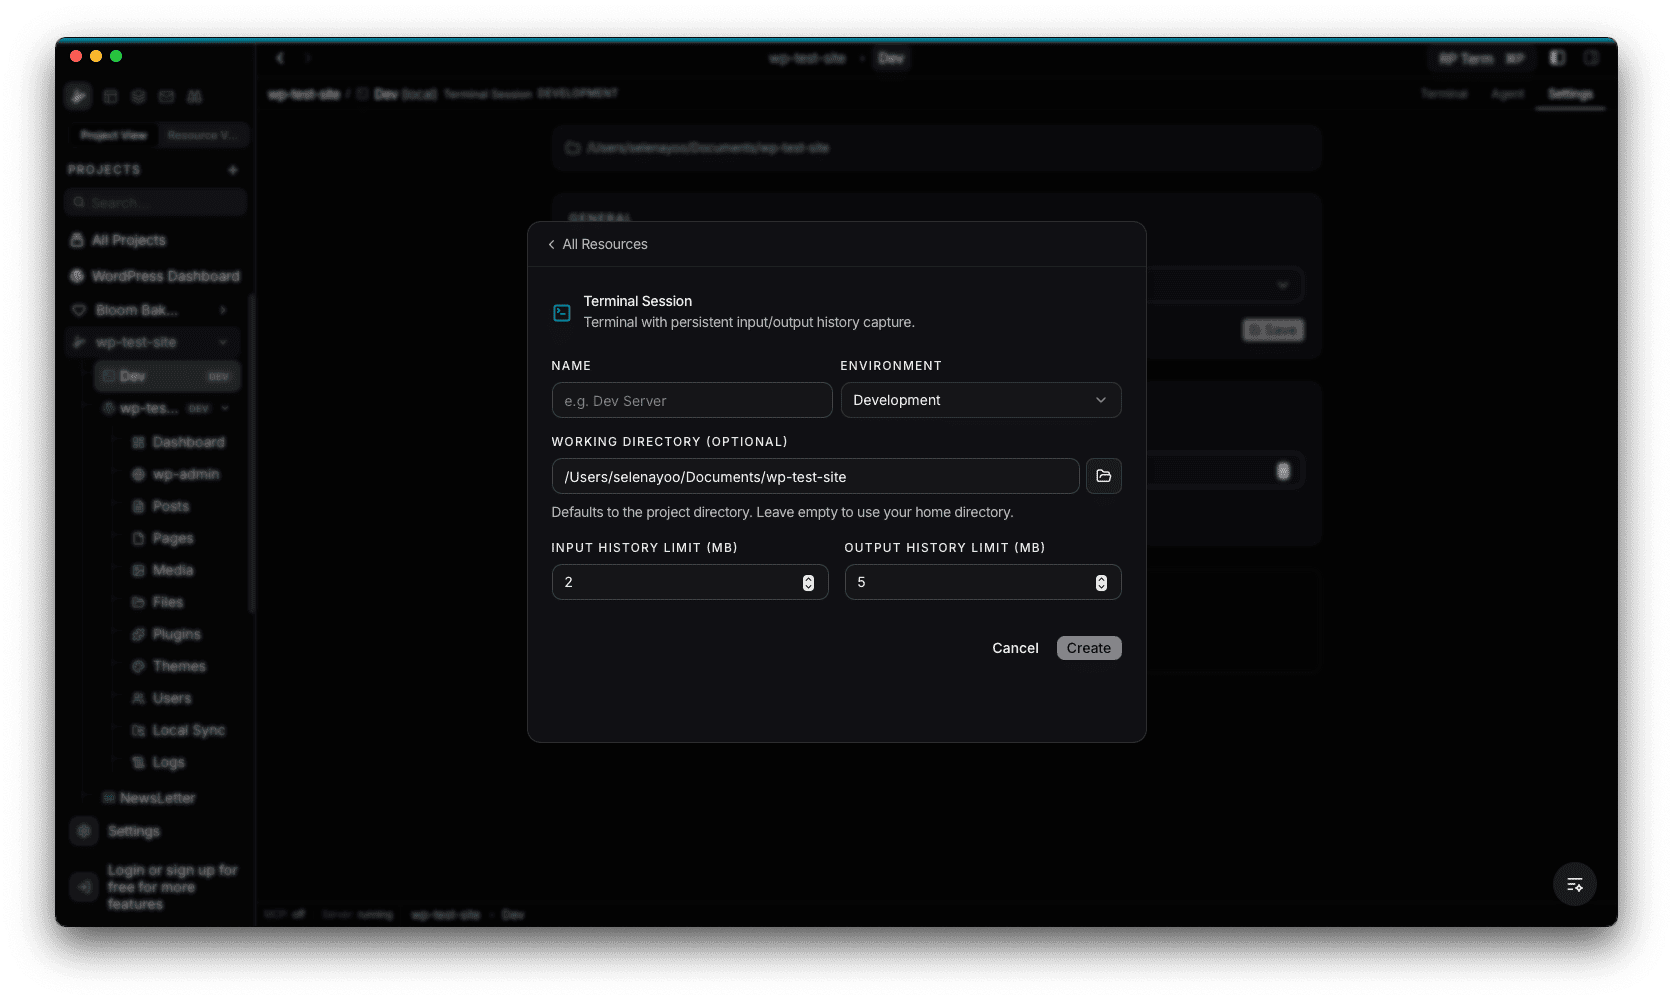
The creation form lets you configure:
- Name: a label for the terminal (e.g. “Dev Server”)
- Environment: the environment tag (Development, Staging, Production, etc.)
- Working Directory: the starting directory for the shell. Defaults to the project directory. Leave empty to use your home directory.
- Input History Limit (MB): max size for captured input history (default 2 MB)
- Output History Limit (MB): max size for captured output history (default 5 MB)
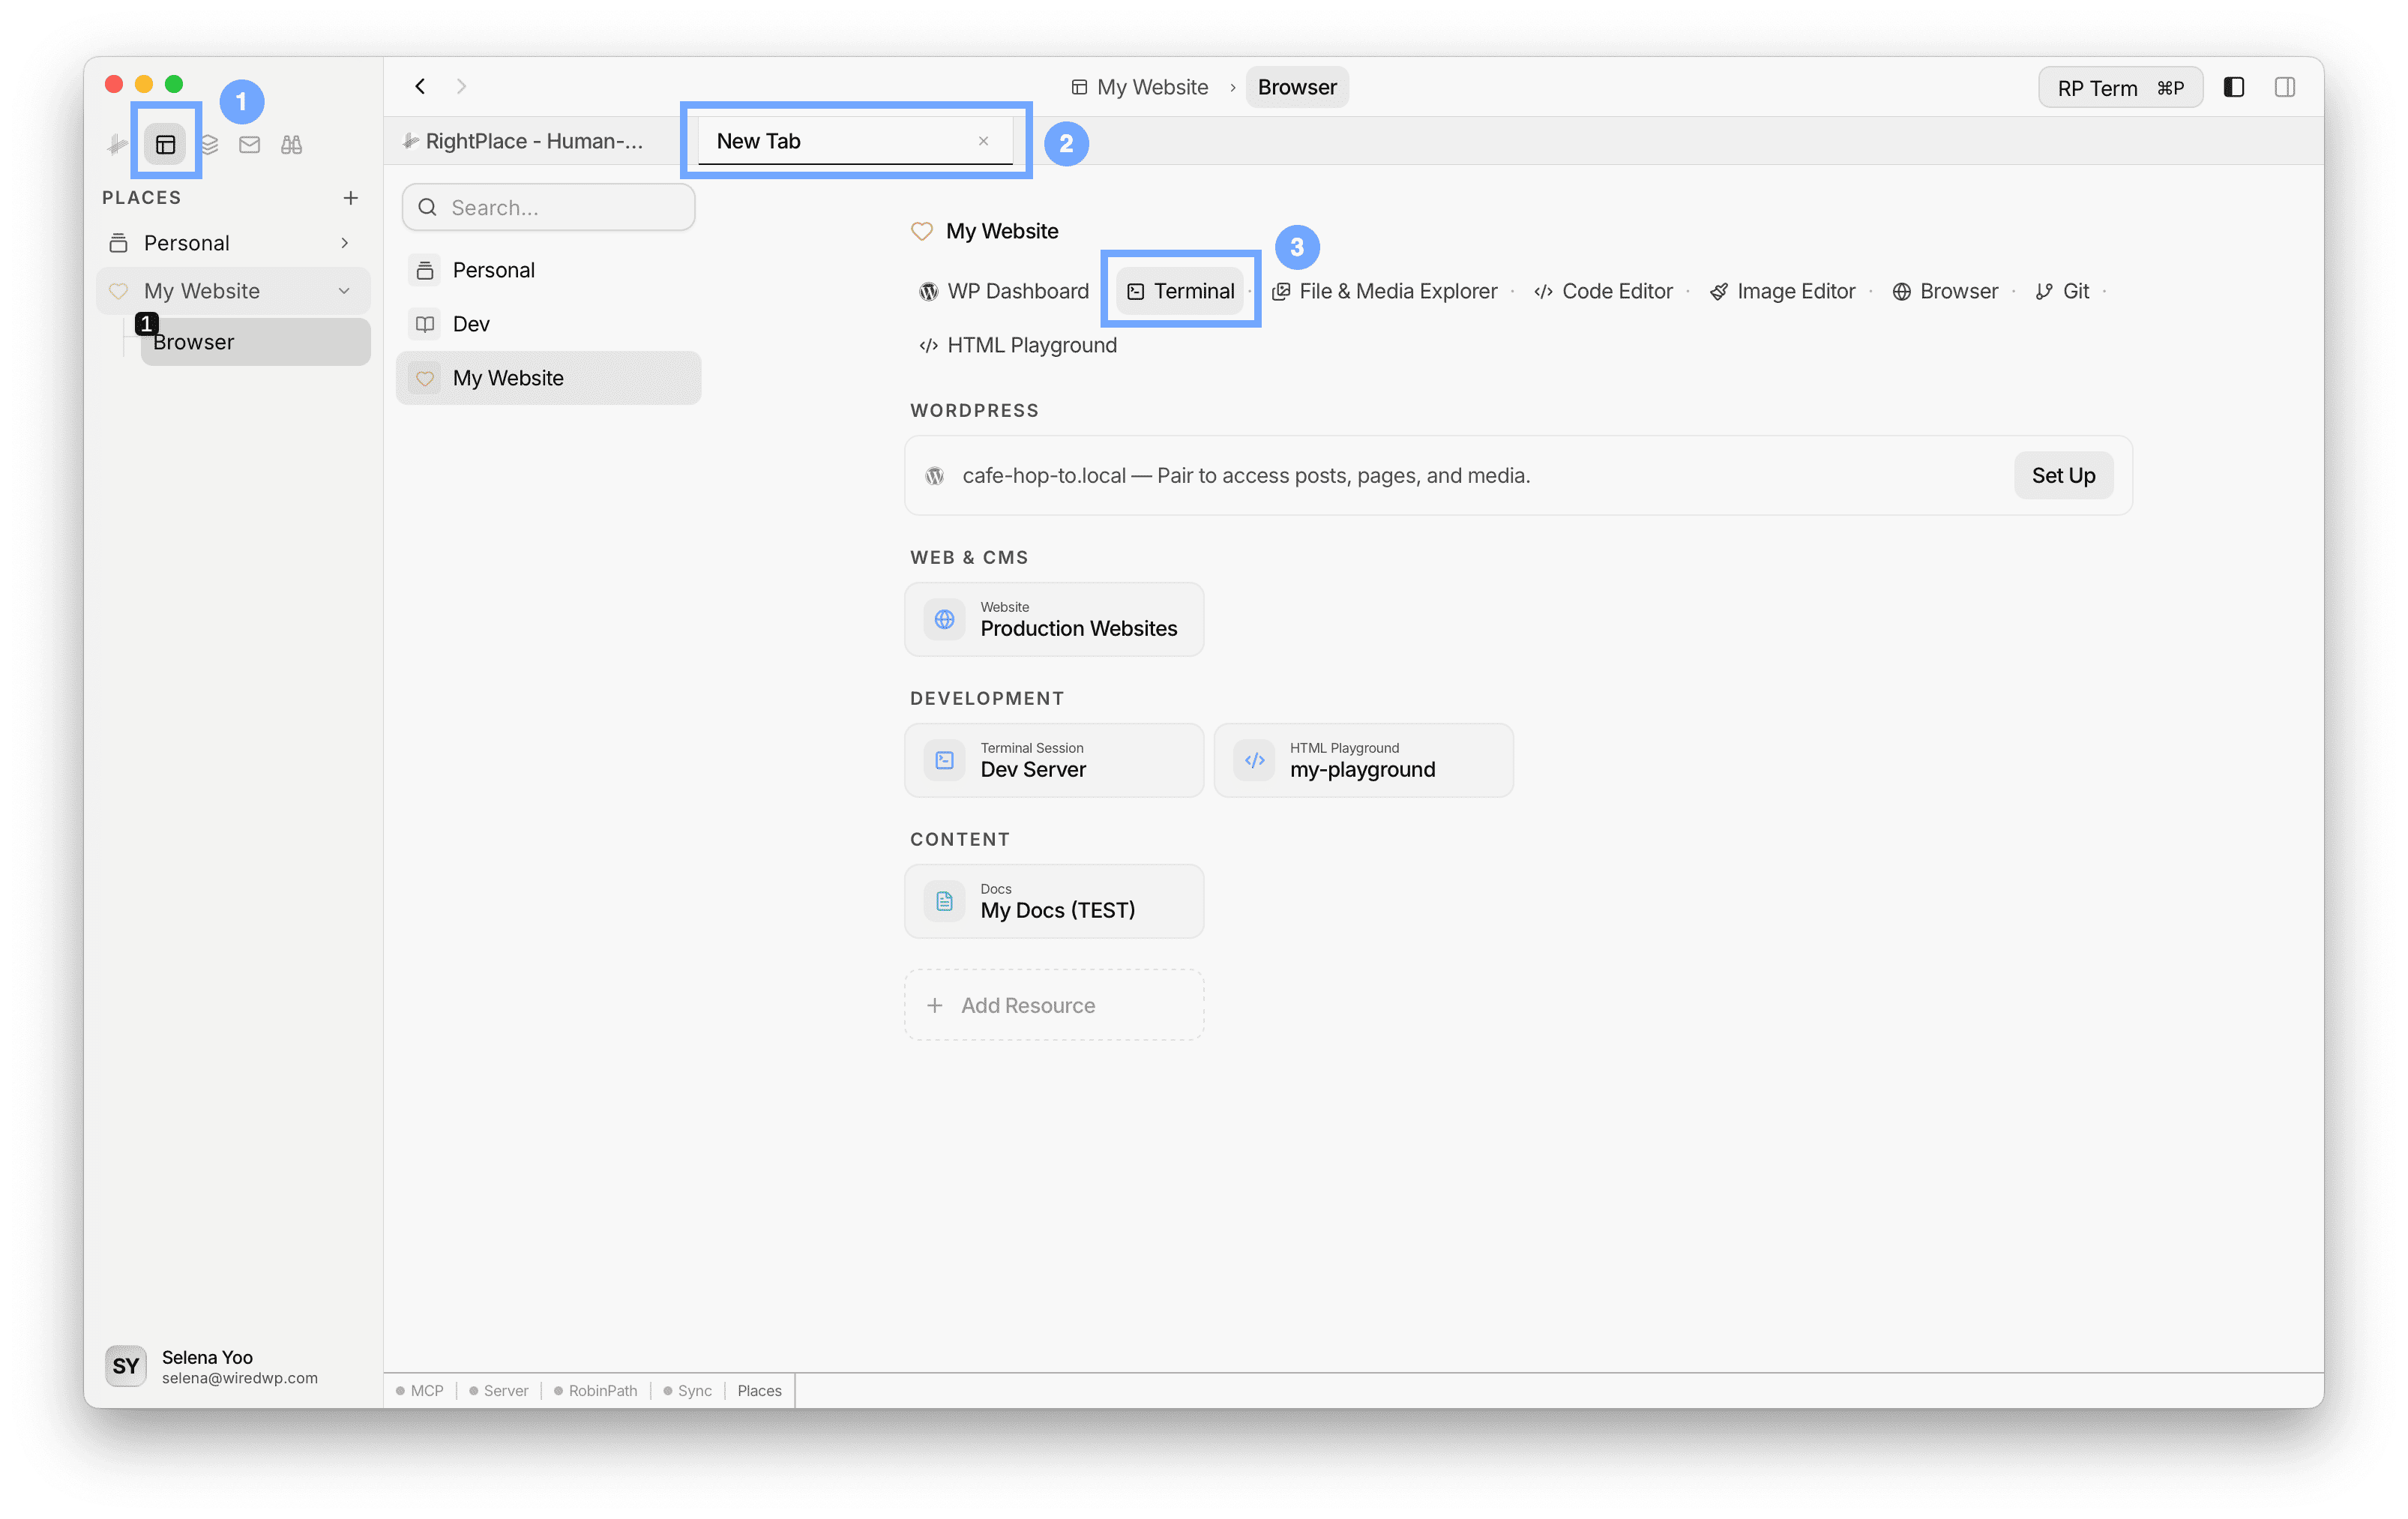
Tip: Terminal Session can be opened in two ways.
- Resource applet: a saved terminal in your Place/Project sidebar for ongoing work and persistent context.
- Utility applet: a temporary terminal launched from New Tab for quick one-off commands.
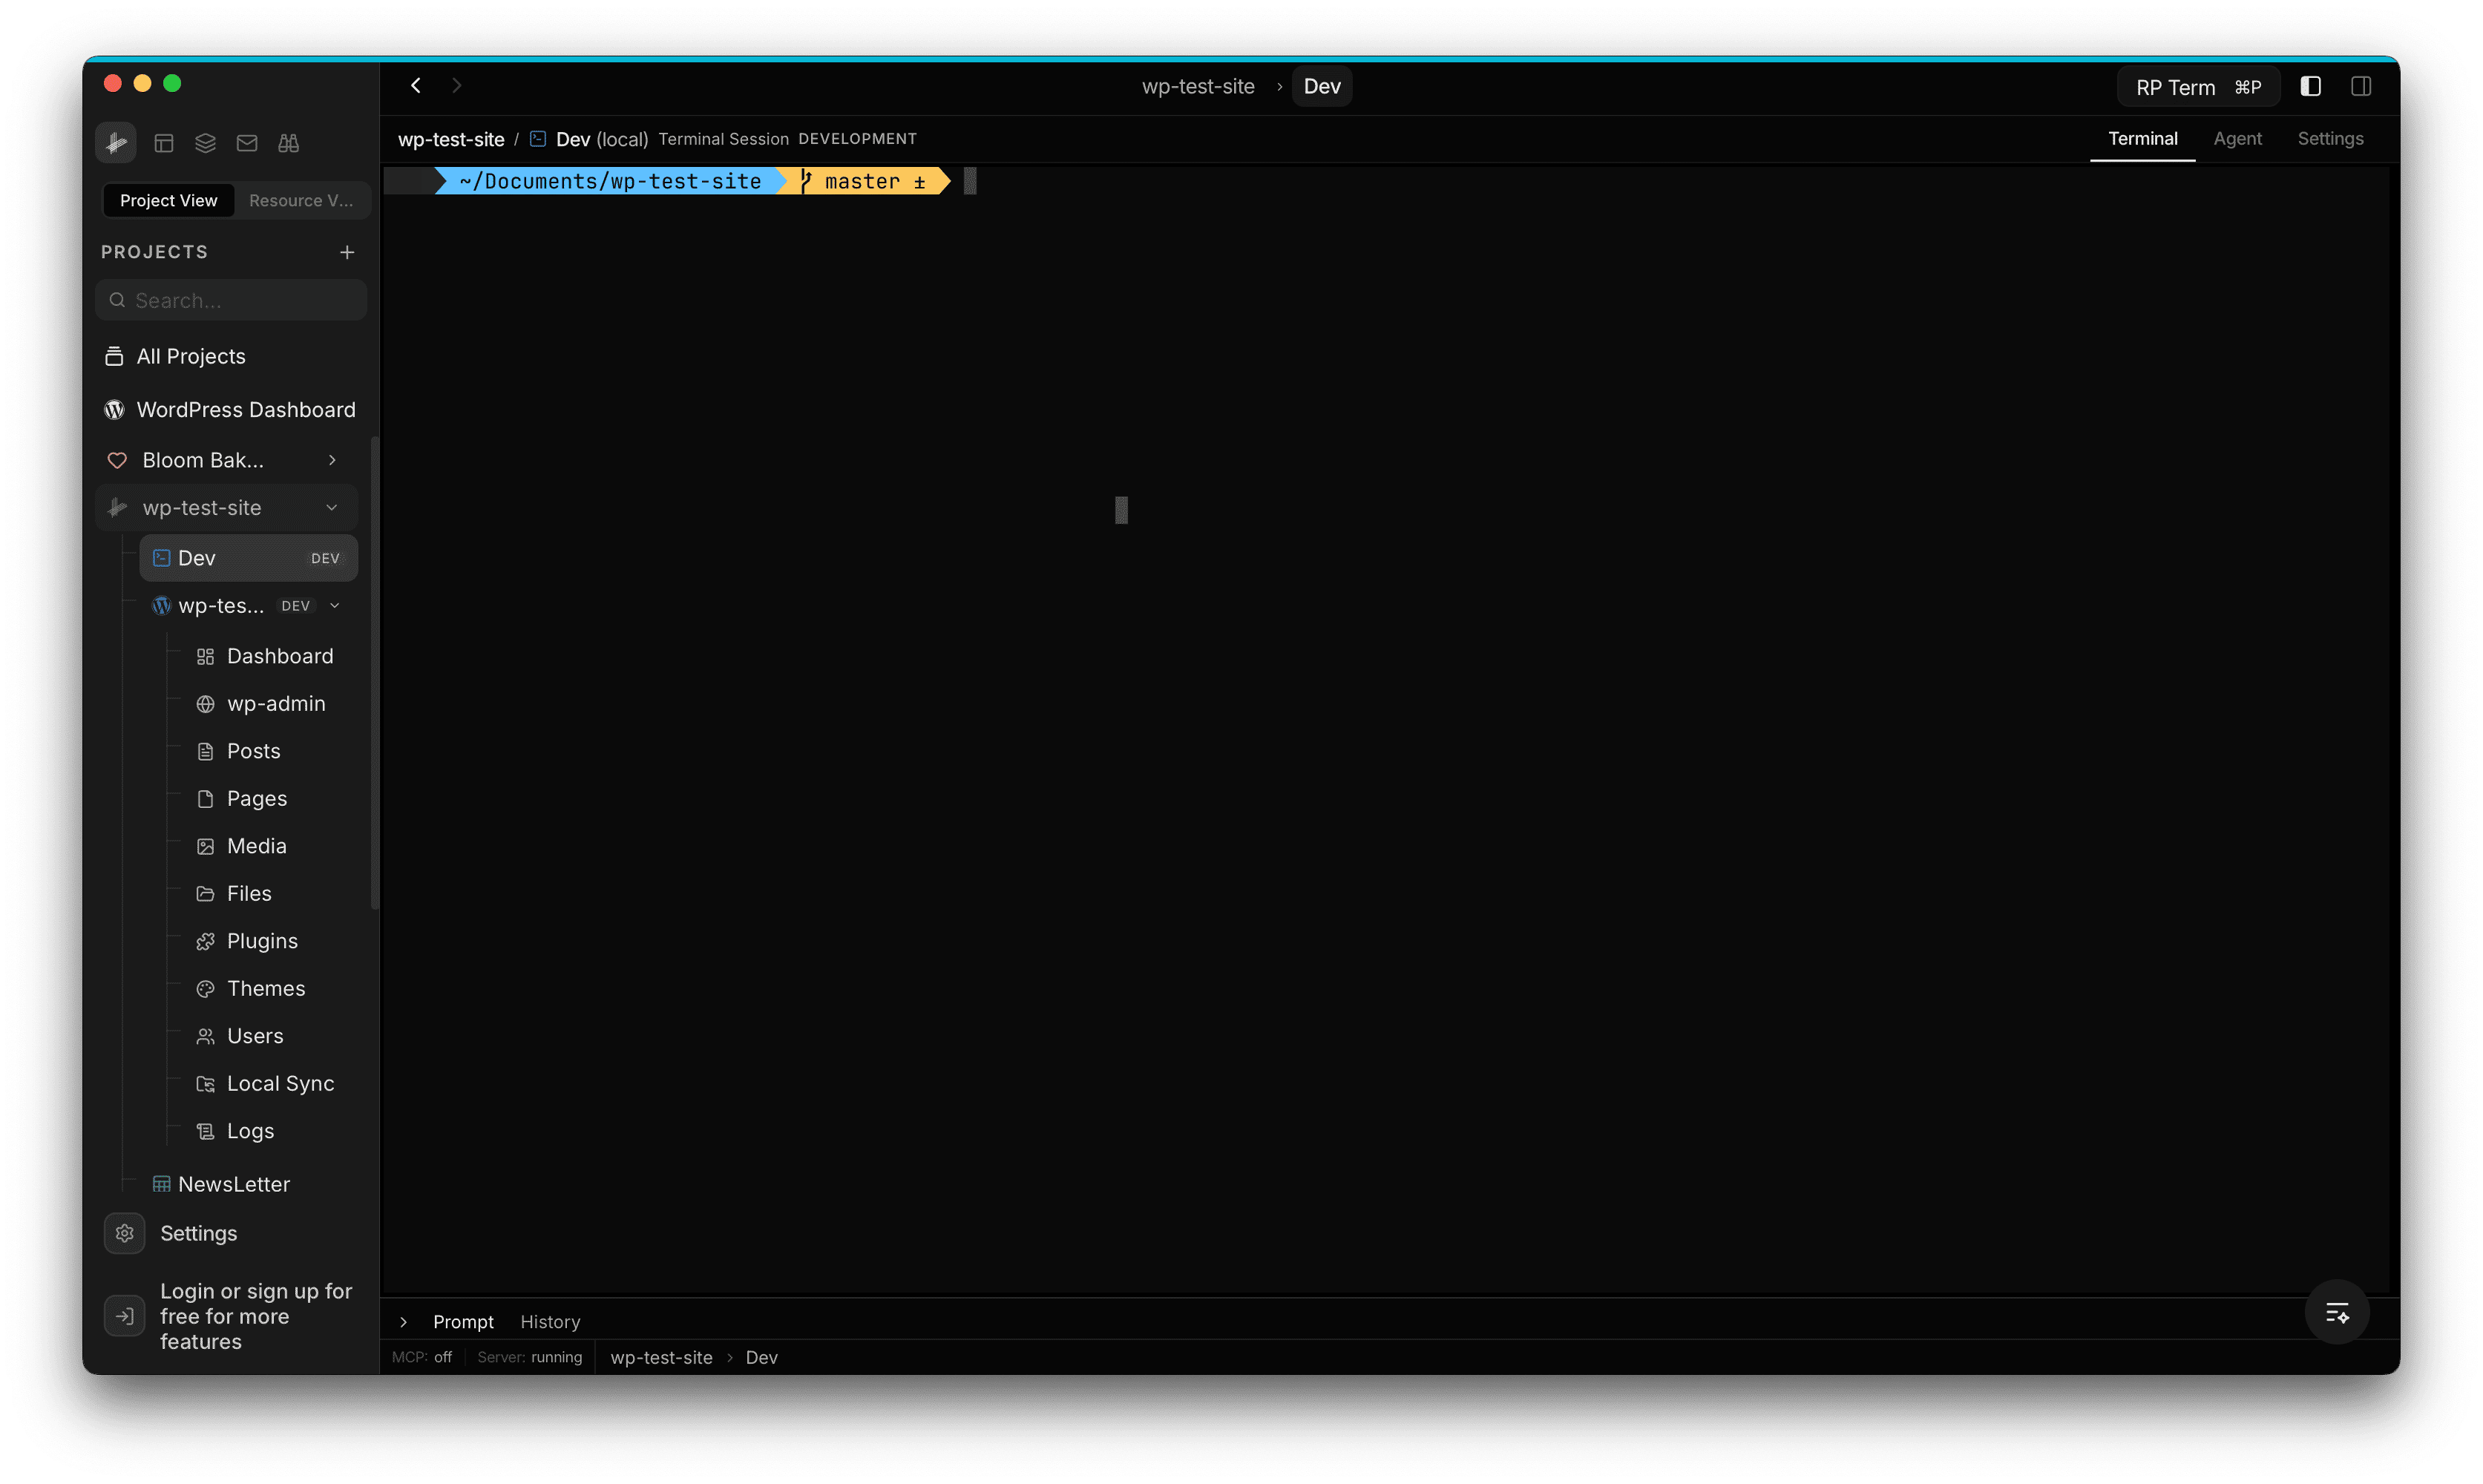
Using the Terminal
Once created, the terminal opens a shell session in the configured working directory. The breadcrumb at the top shows the project, stage, and session type (e.g. wp-test-site / Dev (local) Terminal Session DEVELOPMENT).
The top-right tabs let you switch between:
- Terminal: the active shell session
- Agent: AI assistant context
- Settings: terminal and connection configuration
Prompt & History
At the bottom of the terminal, a collapsible panel provides two tabs:
- Prompt: a text input for composing commands before sending them to the terminal. It keeps a history of up to 200 commands that you can click to re-use.
- History: a full log of the session with timestamps, showing both input and output.
The panel is resizable. Drag the divider to give it more or less space.
Terminal Settings
Global terminal settings are available under Settings > Terminal.
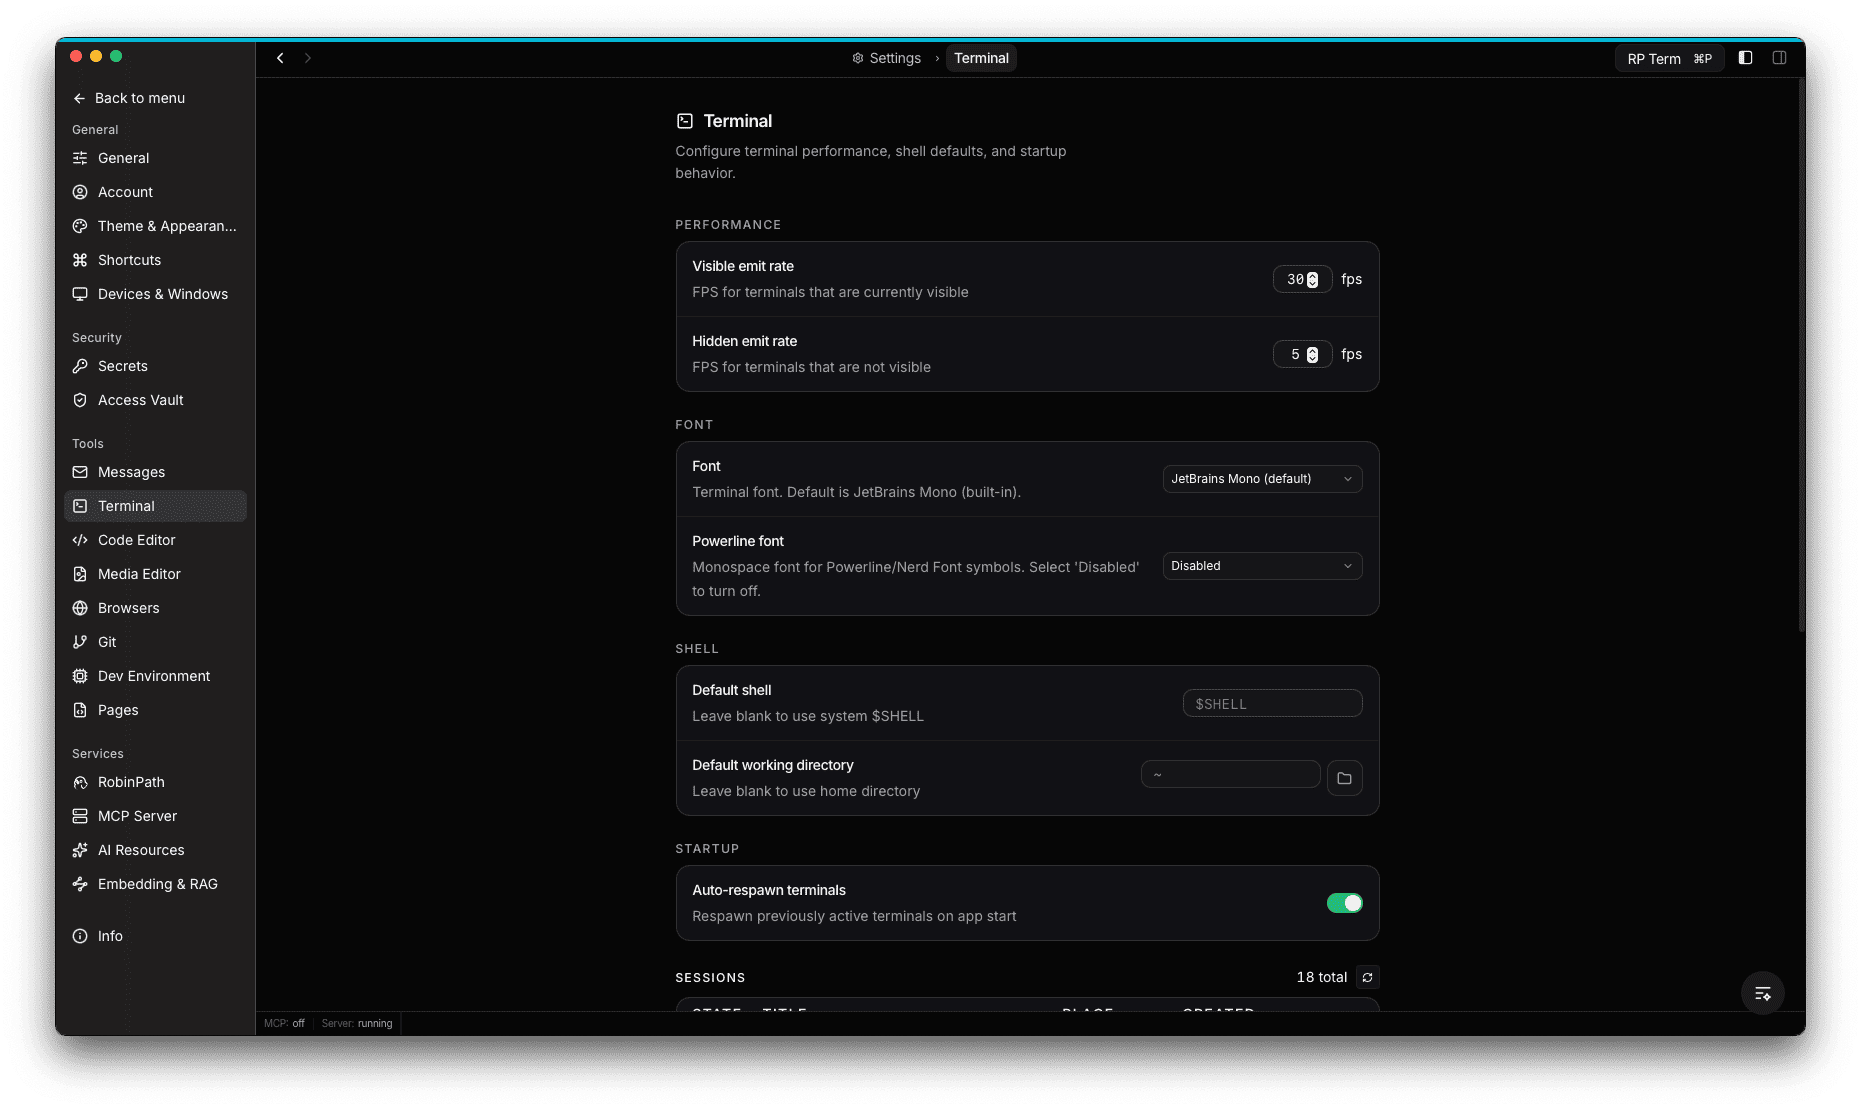
- Performance: configure the visible emit rate (FPS for terminals you can see, default 30) and hidden emit rate (FPS for background terminals, default 5)
- Font: choose a terminal font (defaults to JetBrains Mono) and a separate Powerline font for Powerline/Nerd Font symbols
- Shell: set a default shell (leave blank to use system $SHELL) and default working directory (leave blank to use home directory)
- Startup: toggle auto-respawn to automatically reopen previously active terminals when the app starts
- Sessions: view and manage all terminal sessions across your projects
Session Persistence
Terminal sessions are persistent. When you switch to another tab and come back, the session is still running. Sessions also survive app restarts: the terminal reattaches to the same PTY process, preserving your scroll history and working directory.
The status bar at the bottom shows the current project and stage context (e.g. wp-test-site > Dev), along with server status.
SSH Connections
You can add SSH connections to access remote servers directly from RightPlace.
Adding an SSH Connection
- Open the Add Resource dialog in your project
- Choose SSH as the resource type
- Enter the connection details: host, port, and username
- Select an authentication method:
- Password: enter the server password
- SSH Key File: select a key file from your local machine (with optional passphrase)
- SSH Key Paste: paste the key content directly (with optional passphrase)
- Click Test Connection to verify, then save
Credentials are stored in an encrypted vault. They are never logged or stored in plain text.
Using an SSH Session
Once connected, the SSH terminal works just like a local terminal session. You get the same GPU-accelerated rendering, the same Prompt and History panel, and the connection info is shown at the top of the session.
If the connection drops, the tab closes automatically. You can reconnect by opening the SSH resource again.
Widget
Appears when a Terminal tab is active. Reserved for future terminal-specific tools and information.
Next steps
- Database: Browse and query databases
- SFTP / FTP: Transfer files to remote servers